Showing posts with label the. Show all posts
Showing posts with label the. Show all posts
Sunday, February 15, 2015
Where to get The best woodworking bench
Best The best woodworking bench

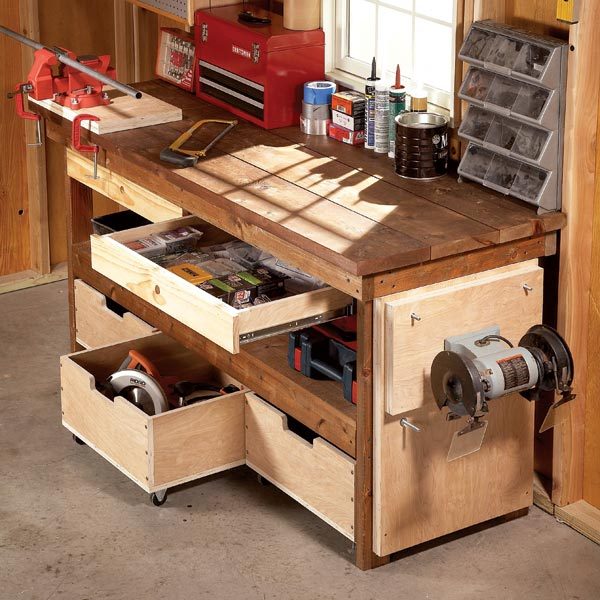


diagnosticate The best woodworking bench whom many geezer look for mortal become thrifty because locate The best woodworking bench
Maybe this The best woodworking bench post Make you know more even if you are a beginner in this field
Wednesday, February 11, 2015
Where to get What is the best finish for woodworking bench
Try What is the best finish for woodworking bench


.jpg)
spot What is the best finish for woodworking bench whose much man court woman get fortunate as for since find What is the best finish for woodworking bench
Well this What is the best finish for woodworking bench share useful for you even if you are a beginner in this field
Wednesday, March 5, 2014
On the DL for a while
Well, a while back I had posted about blowing my knee out and tearing my ACL while playing basketball. I had ACL replacement surgery on Thursday, the 29th, so I am laid up for a while so no major woodworking for a while. Prior to the surgery and I had been on a pen making binge so once I am able to get up and about without much pain I will be back at that. I have a bar stool I can use while at the lathe and do some turning so that will help.
In the mean time, I have been working on my main website www.vanvleetwoodworking.com Right now, it is major lame and outdated! I am not happy with it at all so I am poking around the Internet and looking for some ideas on design and layout. I am using Microsoft Expression Studio to build it so I am learning that now as well. I hope to have something up soon, like this week. If others out there are using Expression, I would love some pointers and links to some resources out there to keep learning; Ive found some good ones, but know people always have others they like.
Hope to be back up and woodworking soon! Be safe!
Read More..
In the mean time, I have been working on my main website www.vanvleetwoodworking.com Right now, it is major lame and outdated! I am not happy with it at all so I am poking around the Internet and looking for some ideas on design and layout. I am using Microsoft Expression Studio to build it so I am learning that now as well. I hope to have something up soon, like this week. If others out there are using Expression, I would love some pointers and links to some resources out there to keep learning; Ive found some good ones, but know people always have others they like.
Hope to be back up and woodworking soon! Be safe!
Tuesday, March 4, 2014
The Zen sand trap
I was going to make a simple Zen Garden. You know, those little boxes that let you rake out patterns in sand, usually surrounding a couple of stones.
Somehow it struck me that sand traps too, always contain a rake. Hey, why not combine the two?
Read More..
Somehow it struck me that sand traps too, always contain a rake. Hey, why not combine the two?
Media Cabinet Progress on the doors
So with starting back to work on my normal job, I havent spent a ton of time this last week on the media cabinet, just a little bit here and there. I was able to do some work on it today. During the week I was able to work on getting the base glued up. Below you can see where I am gluing up the long stretchers. As you can see, I dont have any clamps long enough for this so I had to improvise.
So today I decided to do some more work on the doors; specifically the two outer doors. These doors are 26" tall by 13" wide. As I mentioned in my last post, the center panel is one solid piece of wood. What I worked on today was to mill up the rails and stiles. I am using 2" rails and stiles so once I got them cut and planed I used my matched rail and stile bit to rout the pieces. Here are the individual pieces.
And here they are loosely put together.
Here is one door dry fit, without the center panel obviously.
Next, I took the two center panels and used one of my new vertical raised panel bits and routed the panel profile. Here is a glimpse at the profile.
Here is one door dry fit. Note the chalk marks, this is how I keep track of where each piece goes and how they should be oriented.
Straight on look.
Also note that the I kept the stiles about 1" longer; this is on purpose so I can lay the door flat, make sure the panel is centered for glue up and then trim it to exact length. Here are both doors together.
Well, that is all I was able to get done today really. Next I need to finish gluing the bottom together and then I need to do a little trick to them to re-enforce the mortise and tenon joint. Next, I am also going to turn my attention to the bottom panel and take my card scraper to it to get all the glue off from the glue up and work on flattening any unevenness. Hopefully more on that tomorrow!
Be Safe!
Read More..
 |
| From MediaCabinet |
So today I decided to do some more work on the doors; specifically the two outer doors. These doors are 26" tall by 13" wide. As I mentioned in my last post, the center panel is one solid piece of wood. What I worked on today was to mill up the rails and stiles. I am using 2" rails and stiles so once I got them cut and planed I used my matched rail and stile bit to rout the pieces. Here are the individual pieces.
 |
| From MediaCabinet |
And here they are loosely put together.
 |
| From MediaCabinet |
Here is one door dry fit, without the center panel obviously.
 |
| From MediaCabinet |
Next, I took the two center panels and used one of my new vertical raised panel bits and routed the panel profile. Here is a glimpse at the profile.
 |
| From MediaCabinet |
Here is one door dry fit. Note the chalk marks, this is how I keep track of where each piece goes and how they should be oriented.
 |
| From MediaCabinet |
Straight on look.
 |
| From MediaCabinet |
Also note that the I kept the stiles about 1" longer; this is on purpose so I can lay the door flat, make sure the panel is centered for glue up and then trim it to exact length. Here are both doors together.
 |
| From MediaCabinet |
Well, that is all I was able to get done today really. Next I need to finish gluing the bottom together and then I need to do a little trick to them to re-enforce the mortise and tenon joint. Next, I am also going to turn my attention to the bottom panel and take my card scraper to it to get all the glue off from the glue up and work on flattening any unevenness. Hopefully more on that tomorrow!
Be Safe!
Saturday, February 22, 2014
DIY Belgrave Headboard with Ikat Fabric for the Guest Bedroom

Yesterday we finished the headboard for the Guest Bedroom! and I am loving how it turned out! I decided on a belgrave style headboard since the curves would accommodate 54" wide fabric without any awkward seams, read on to see how we did it!
After we gathered our supplies:
3/8" plywood (2 sheets)
1x4s (frame)
1x10 (to cut top of frame out of)
fabric - 2.5 yards purchased from fabric.com
cording
batting
foam
staple gun
We got to work!

We drew a few different curves on cardboard before deciding on this one (try using a compass, paint can or other round objects for the curve)
We used the cardboard as a stencil and traced on the 1x10. Then cut it out with the jigsaw.


Cut the side pieces to length and attached the frame to the plywood with screws (from the back)

Wrapped the frame with batting ...

Sewed fabric wrapped cording

Fabric was cut for the frame - the corners were a bit tricky because the fabric was 54" wide and the headboard was 60" it needed to be applied in pieces across the top - cording was stapled corner to corner

Heat n bond no sew adhesive was placed on top - fabric for other side of the cord was folded and ironed for a crisp edge - placed on top (creased side against the cord) and then ironed

All fabric was pulled tight and stapled on the back. The fabric was cut to accommodate the curve and stapled


Cording was stapled along the interior of the frame
The other piece of plywood was cut to fit inside the frame - leaving extra room for foam, batting, and cording. Foam was cut to the size of the plywood, wrapped in batting and fabric
It was put inside the frame and attached with screws from the back (make sure that your screws arent too long!)
And there you have it! A diy belgrave headboard with cording!

Pillow shams are lampshade cover are made out of this Annie Selke fabric click here for my envelope pillow tutorial (front pillow is from Target - a year or so back)

Click to read more about the nightstand/dresser and lampshade

a bunch of Lisianthus to brighten up the room!

It was my goal to make this for as little $$ as possible and have it still look expensive - check back tomorrow for the price breakdown and how I saved some money and time!
Hope you love it as much as I do!
Tuesday, February 18, 2014
Feeling Better Finished the Spoon
Hi Everyone,
I woke up early this morning and I was feeling much, much better so I grabbed the spoon and finished it. Here it is:

This spoon is red oak, not white oak as I originally thought, and I finished it with a thin coat of linseed oil.
I like the way this one came out. I like the big, round bowl. I usually make the bowls of my spoons oval in shape but I may switch over to a rounder, broader bowl in the future.
I am going to resume my turning schedule tomorrow as I left a lot of things undone this week and I have work to catch up on. So tomorrow Ill take a look at the walnut bowl and resume working on it.
See you then,
VW
Read More..
I woke up early this morning and I was feeling much, much better so I grabbed the spoon and finished it. Here it is:
This spoon is red oak, not white oak as I originally thought, and I finished it with a thin coat of linseed oil.
I like the way this one came out. I like the big, round bowl. I usually make the bowls of my spoons oval in shape but I may switch over to a rounder, broader bowl in the future.
I am going to resume my turning schedule tomorrow as I left a lot of things undone this week and I have work to catch up on. So tomorrow Ill take a look at the walnut bowl and resume working on it.
See you then,
VW
Friday, February 14, 2014
My Cozy Shop Floor Part I The Cozy Part
My new shop floor is soft and cozy warm.
 |
| Where We Started On Friday Night. |
There are many components to a great shop. One that I dont think gets quite enough credit - and one that Ive ignored until now - is the floor. Like many woodworkers with a garage shop, for years Ive simply used the original concrete as my floor. It was there and machines on wheels were able to roll on it - it worked.
As Ive finished up the odyssey that was my shop walls over the last few months Ive thought about the floor. After the work of the walls, the floor would be quick and simple - provided I could get all my crap off of it. When I realized that my kids would be away with my Dad and my Wife away with her sister on the same weekend I knew I had a chance to install the floor that I had to take advantage of.
On Friday of the big weekend, once everyone was on their way I began by moving all of the living room furniture into the dining room. Then I laid out drop cloths and began moving my shop into the living room. I brought my Cousin over and together we emptied everything out of the shop except the table saw, band saw and jointer. Then I paid him with dinner.
I dragged myself up on Saturday and got to work. Unlike many published designs for installing shop floors over masonry floors, I built mine without sleepers. To get away without the support sleepers provide, I used 60 psi extruded polystyrene (XPS) rather than the standard 20 psi. Between the high psi XPS and the diffusion the 3/4" OSB would provide to point loading of weight, I decided no sleepers would be needed. I didnt do any structural calculations, but so far the lack of sleepers hasnt been a problem.
 |
| The gap between the wall and the XPS is filled with Great Stuff |
After vacuuming the floor, the first step was to lay down the XPS. I measured a relatively straight line about 1/2" off the curb at bottom of the exterior wall of my shop. I used that line to set the XPS. I filled the gap between the curb and the XPS with Great Stuff. I used Window & Door great stuff with my Pro-Gun, as I have for the entire shop renovation. The gun gives application control unachievable with the standard can and straw. The Window and Door Great Stuff is better than standard Great Stuff because it stays softer and expands less than standard Great Stuff, making installation easier.
 |
| Air sealing as I go. |
The XPS I used has a rabbit around the edge. I installed it upside down so that when the sheets were laid against each other, the rabbits created a channel which I filled with M-1 caulking. This allowed me to air seal between the boards of insulation.
With the XPS down, it was time for OSB.
Tuesday, February 11, 2014
The executive desk delivery day and final pics
The desk has been delivered, and the customer is happy! We have the glass top on order and it should be in next week.
As you can see, the color is a close match, but the existing paneling on the walls has been slightly sun faded - the desk color will catch up with this in a year or two. Also, the two trim styles on the desk match what is on the walls, tying everything together!


Read More..
As you can see, the color is a close match, but the existing paneling on the walls has been slightly sun faded - the desk color will catch up with this in a year or two. Also, the two trim styles on the desk match what is on the walls, tying everything together!
New Yankee Workshop Workbench update cutting the inserts out of the top
I cut the slot out of the benchtop for the dogs and tailstock. What a giant pain in the rear? Norm does it in the video in like 30 seconds and it took me nearly an hour.
I attached the 2 pieces of plywood together with 1" drywall screws and some of them ended up poking through so I had to cut off all the tips with my dremel before running the piece through the tablesaw.

I marked the two ends of the slot and then cut them on the tablesaw.

I got them close and then finished them with a jigsaw.

I also used the jigsaw to cut the ends.

All cut and ready for the next step.

I marked the corners and then clamped a framing square down to use as a cut guide for my small cordless saw.

I cut it close and then used the jigsaw to finish it.

I made sure that all my cuts were square to the material.

Here it is all cut out.


Subscribe to:
Posts (Atom)